lnmp动态网站搭建
lnmp是什么?
LNMP是指一组通常一起使用来运行动态网站或者服务器的自由软件名称首字母缩写。L指Linux,N指Nginx,M一般指MySQL,也可以指MariaDB,P一般指PHP,也可以指Perl或Python。
准备工作:检查电脑是否已经安装nginx,mysql,php等。
rpm -qa nginx mysql php* mariadb

配置yum源
配置yum源的步骤
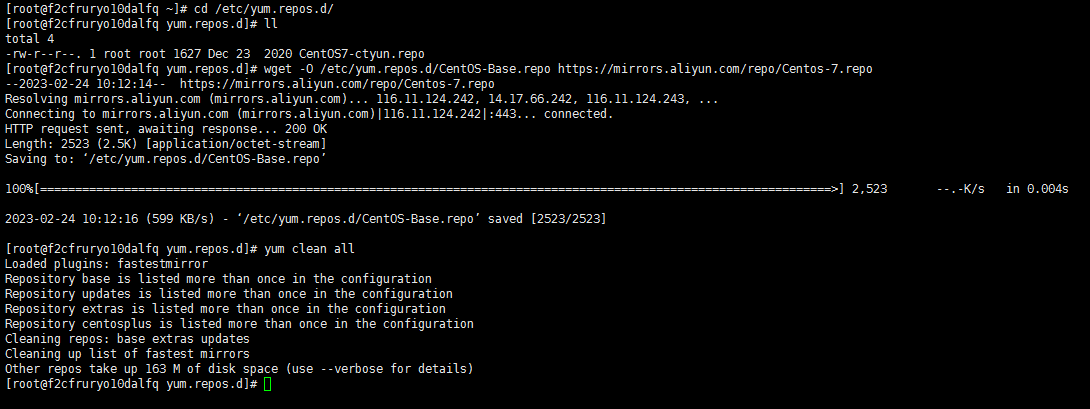
1.备份原有的yum源
mv /etc/yum.repos.d/CentOS-Base.repo CentOS-Base.repo.bak
2.配置yum源,找到阿里云的官方镜像源地址 https://developer.aliyun.com/mirror/
3.下载centos7的yum源
wget -O /etc/yum.repos.d/CentOS-Base.repo https://mirrors.aliyun.com/repo/Centos-7.repo
4.清空旧的yum缓存
yum clean all
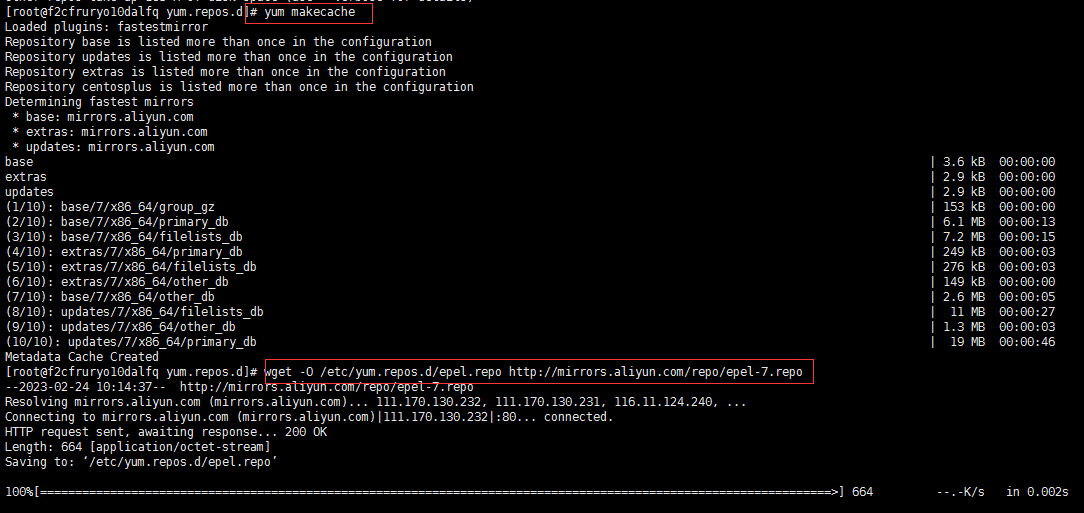
5.生成新的yum仓库缓存
yum makecache
6.配置一个第三方的 额外仓库源 (epel源),这个源的作用是,如果阿里云源找不到这个软件,就在这里找
wget -O /etc/yum.repos.d/epel.repo http://mirrors.aliyun.com/repo/epel-7.repo
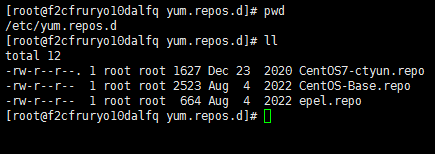
配置好后查看一下
一.部署nginx
1.配置nginx源
rpm -Uvh http://nginx.org/packages/centos/7/noarch/RPMS/nginx-release-centos-7-0.el7.ngx.noarch.rpm

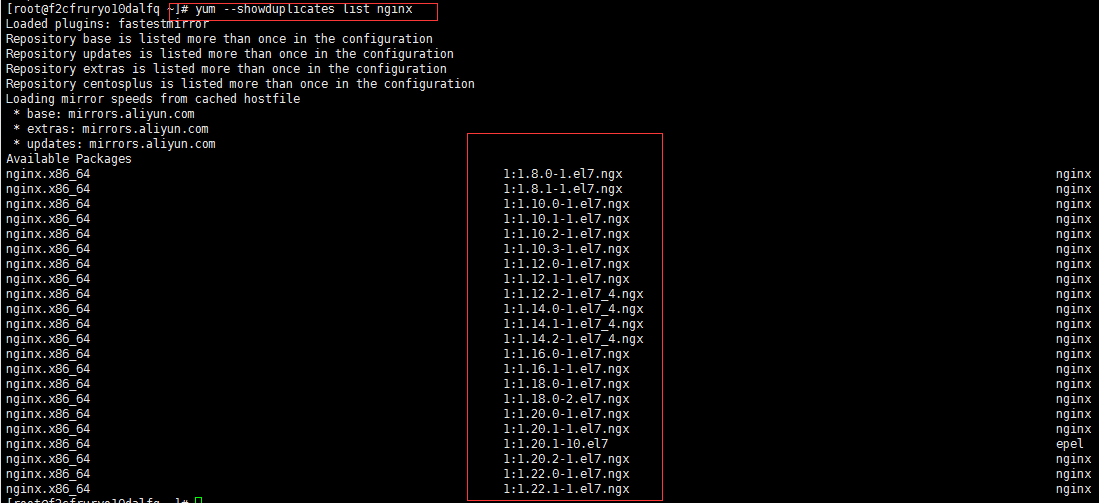
2.列出可以安装的nginx以及安装版本
yum --showduplicates list nginx
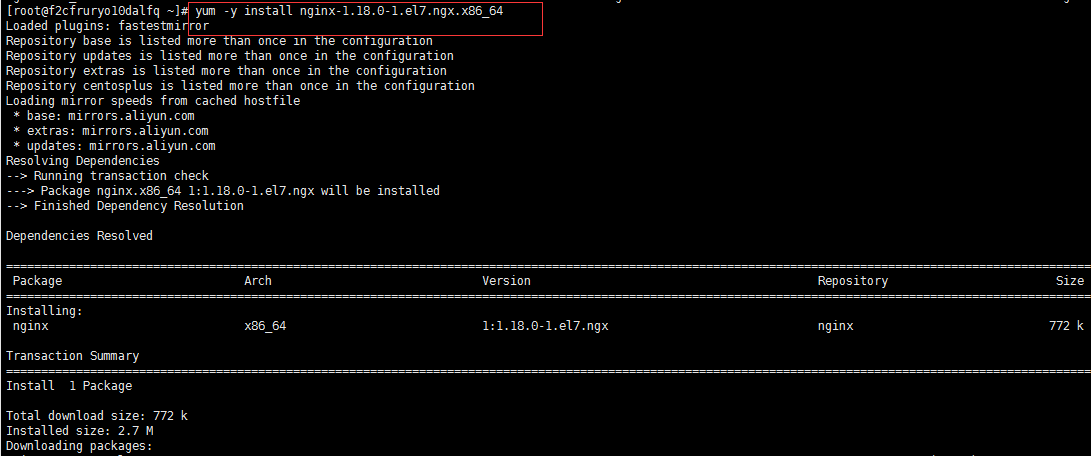
3.指定安装nginx-1.18.0-1.el7.ngx.x86_64
yum -y install nginx-1.18.0-1.el7.ngx.x86_64
4.安装完成启动验证
#验证是否安装成功
rpm -qa nginx
#启动nginx
systemctl start nginx
#查看nginx进程(查看是否已经启动)
ps -ef |grep nginx
#设置nginx开机自启
systemctl enable nginx
#临时关闭防火墙
systemctl stop firewalld

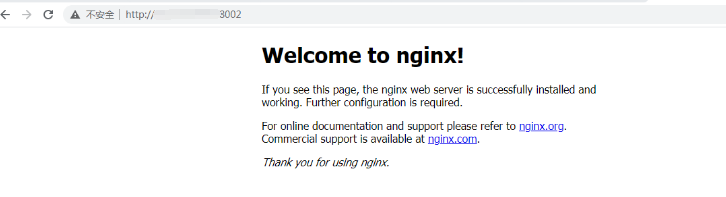
5.浏览器访问一下是否可以成功访问
http://ip:端口 #默认端口是80,我这里修改成了8002,根据自己的端口进行访问
能够访问代表nginx安装完成
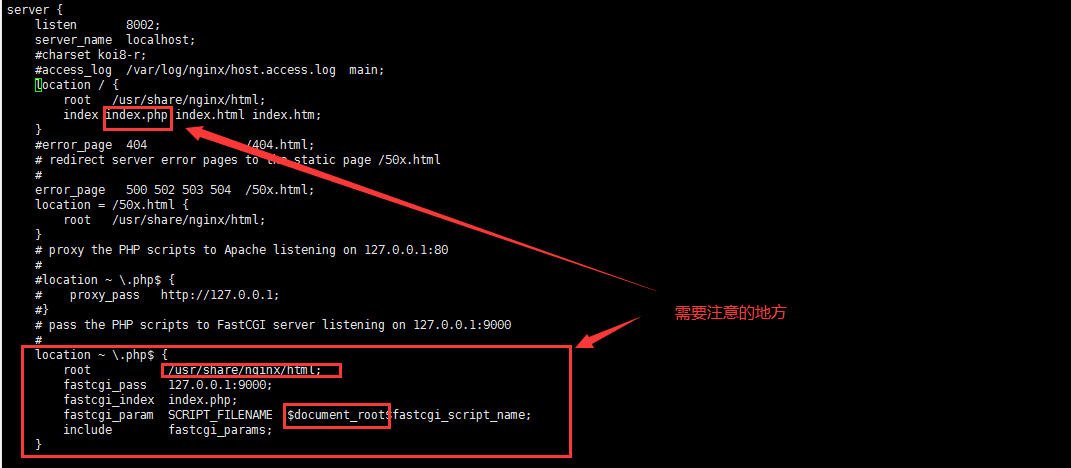
6.修改nginx配置文件
#这个配置文件需要php安装完成后进行修改
#修改的路径 vim /etc/nginx/conf.d/default.conf
server {
    listen       8002; #端口号
    server_name  localhost; #主机名,如果有域名填写域名
    location / {
        root   /usr/share/nginx/html; #源码存放路径
        index  index.php index.html index.htm; #支持格式
    }
    error_page   500 502 503 504  /50x.html;  #报错引导
    location = /50x.html {
        root   /usr/share/nginx/html;
    }
    location ~ \.php$ { #连接php
        root           /usr/share/nginx/html;
        fastcgi_pass   127.0.0.1:9000;
        fastcgi_index  index.php;
        fastcgi_param  SCRIPT_FILENAME  $document_root$fastcgi_script_name;
        include        fastcgi_params;
    }
}
3.修改配置文件之后重新启动nginx
systemctl restart nginx

二.php部署
1.配置PHP的yum源
#依次执行一下命令
yum install epel-release
yum install http://rpms.remirepo.net/enterprise/remi-release-7.rpm
#查看一下是否存在php74安装包
yum search php74
2.安装
yum install -y php74-php-fpm php74-php-mysqlnd php74-php-gd
php74-php-fpm #连接nginx的
php74-php-mysqlnd #连接mysql的
php74-php-gd #图形库,处理图片

验证一下是否安装好了
rpm -qa php74-php-fpm php74-php-mysqlnd php74-php-gd

3.启动
#启动php
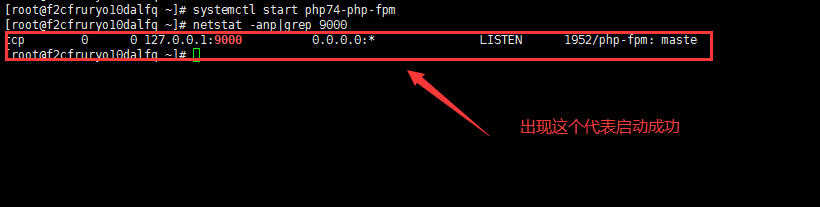
systemctl start php74-php-fpm
#重启
systemctl restart php74-php-fpm
#停止
systemctl stop php74-php-fpm
#开机自启
systemctl enable php74-php-fpm
4.使用查看端口的方式查看是否启动成功
netstat -anp|grep 9000
5.此时可以先去给nginx配置文件配置一下,配置方法查看修改nginx配置文件
修改完成后记得重启nginx
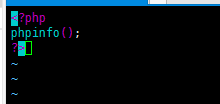
6.编写一个php文件测试
#进入/usr/share/nginx/html/目录
cd /usr/share/nginx/html/
#新创建一个index.php文件
vim index.php
#写入一下内容,这个可以查看php信息
<?php
phpinfo();
?>
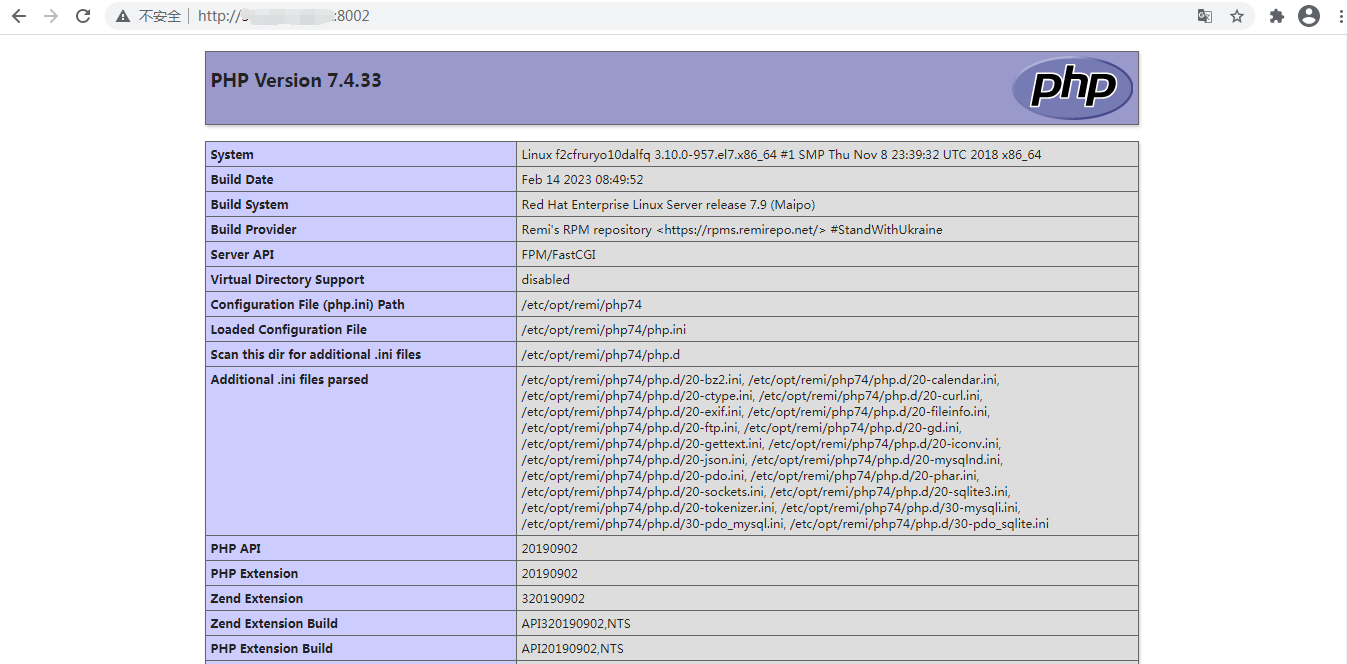
7.浏览器查看一下
http://ip:端口 #默认端口是80,我这里修改成了8002,根据自己的端口进行访问
能出来以下内容代表完成
三.mariadb部署
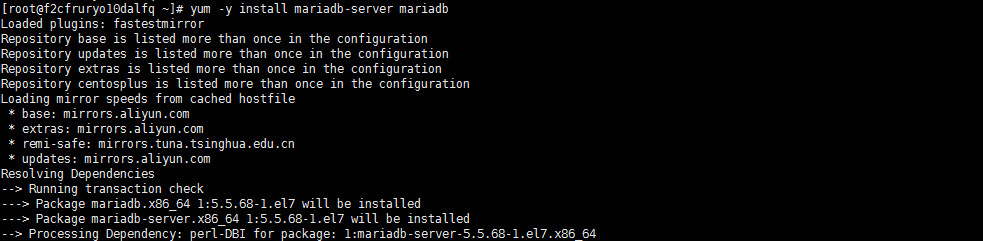
1.安装
#这里使用的是mariadb和mysql差不多
yum -y install mariadb-server mariadb
检查是否安装成功
rpm -qa mariadb-server mariadb

2.启动
#启动
systemctl start mariadb
#重启
systemctl restart mariadb
#停止
systemctl stop mariadb
#开机自启
systemctl enable mariadb
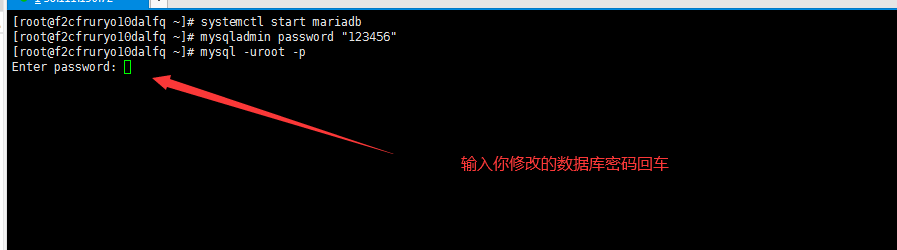
3.登录mysql设置权限
#修改mysql密码
mysqladmin password "123456"
#登录数据库
mysql -uroot -p
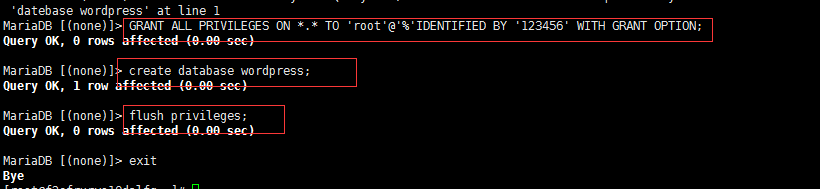
#给数据库设置权限,可以使用其他ip进行登录
GRANT ALL PRIVILEGES ON *.* TO 'root'@'%'IDENTIFIED BY '123456' WITH GRANT OPTION;
#创建一个数据库
create database wordpress;
#刷新
flush privileges;
#退出
exit
登录成功后依次执行
四.项目案例
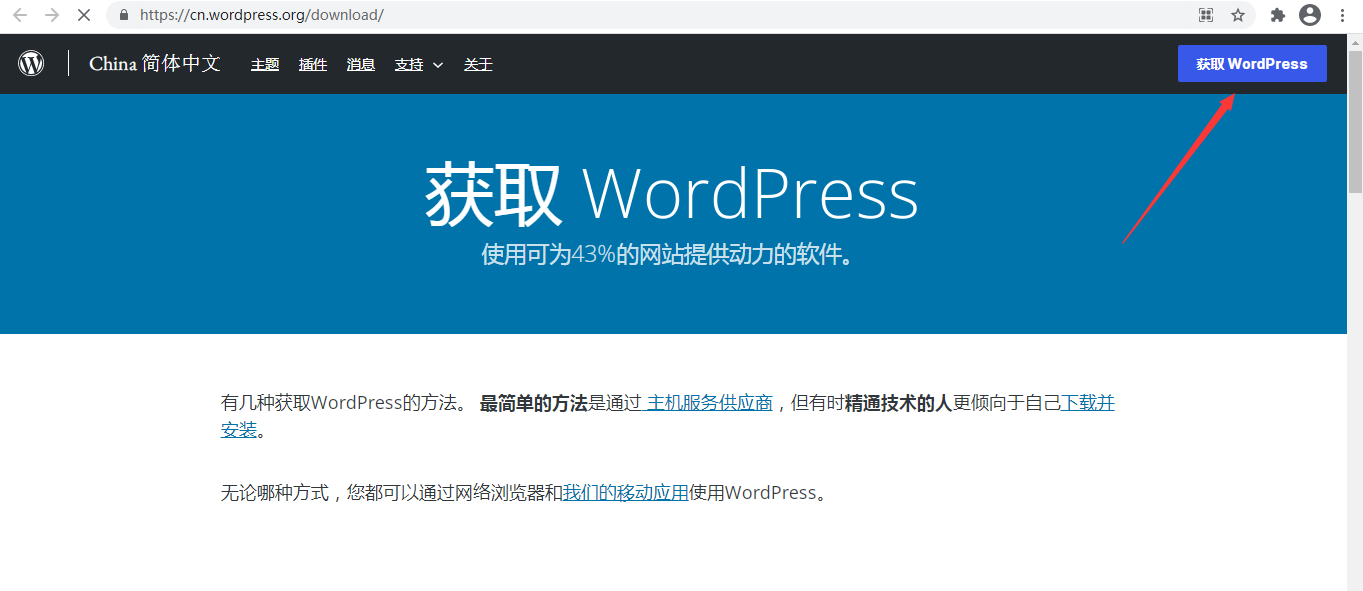
这里使用wordpress搭建测试使用
1.下载wordpress
#下载地址
https://cn.wordpress.org/download/
2.删除/usr/share/nginx/html/里面原本的文件
#也可以自己备份一份
[root@f2cfruryo10dalfq ~]# cd /usr/share/nginx/html/
[root@f2cfruryo10dalfq html]# ll
total 12
-rw-r--r-- 1 root root 494 Apr 21  2020 50x.html
-rw-r--r-- 1 root root 612 Apr 21  2020 index.html
-rw-r--r-- 1 root root  20 Feb 24 11:16 index.php
[root@f2cfruryo10dalfq html]# rm -rf *
[root@f2cfruryo10dalfq html]#

3.上传下载好的wordpress
4.解压wordpress
unzip wordpress-6.1.1-zh_CN.zip

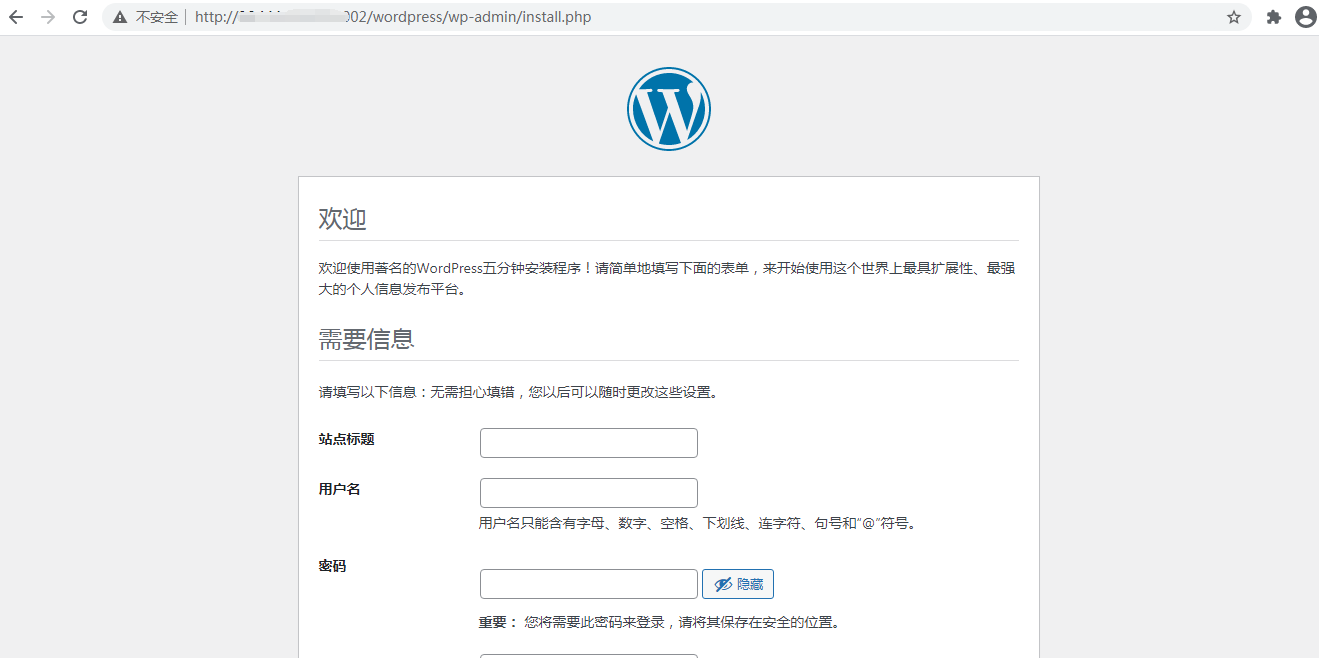
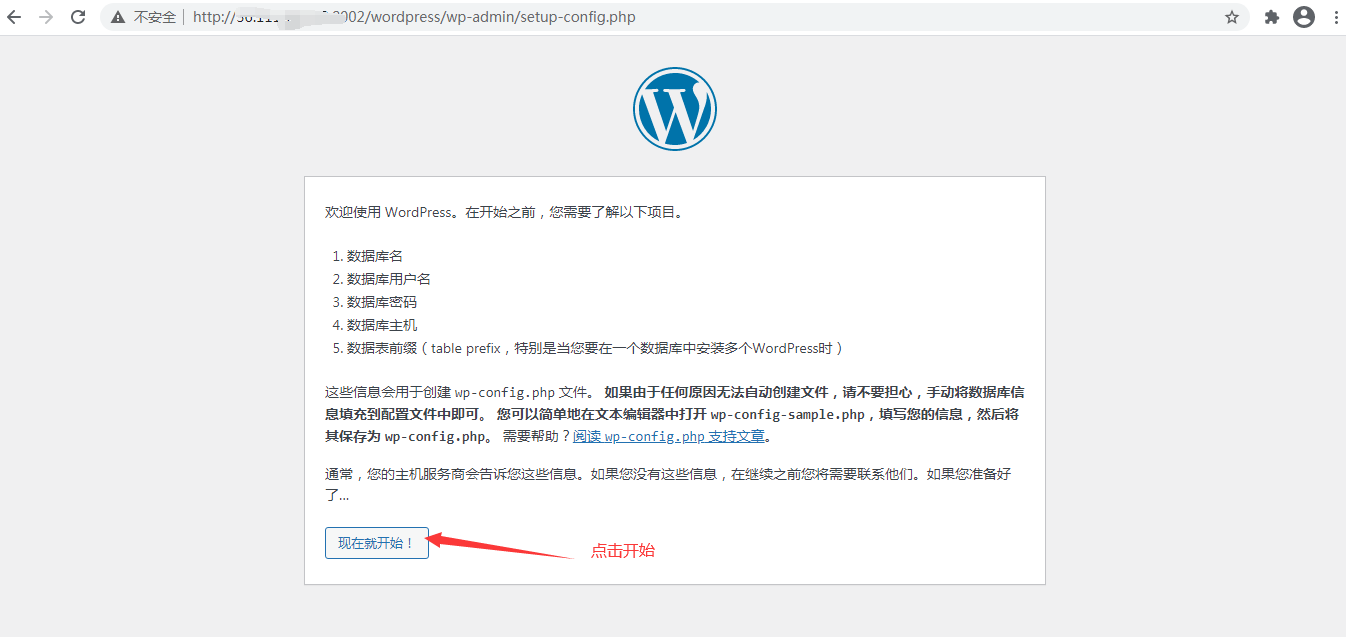
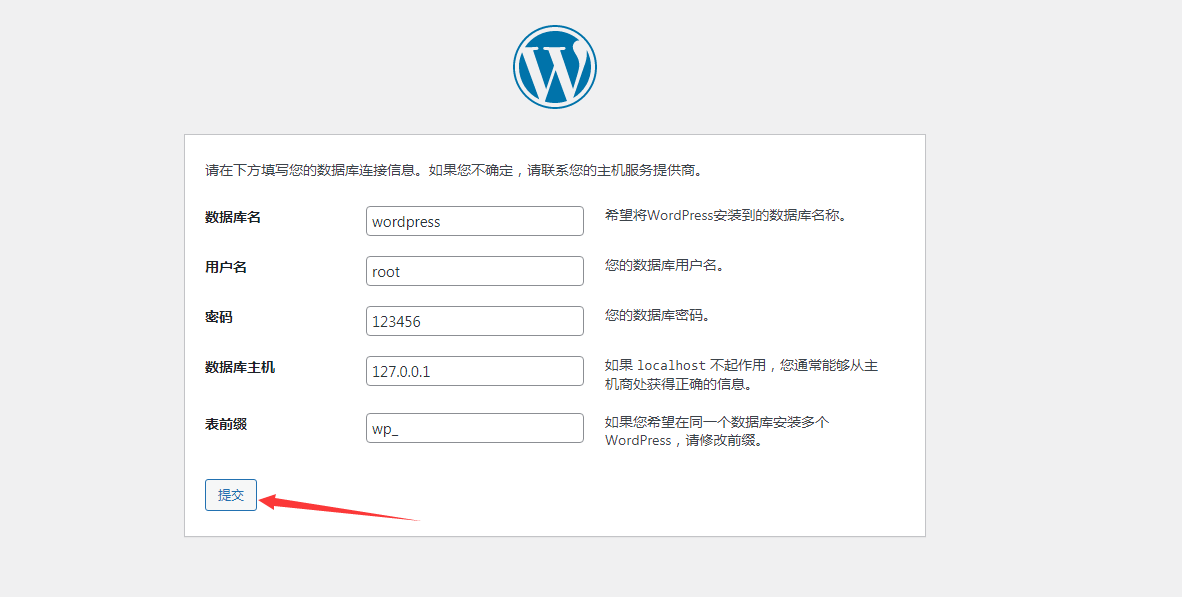
5.浏览器访问进行安装
http://ip:8002/wordpress
 填好内容提交
弹出一下页面需要我们自己再服务器里面写配置文件
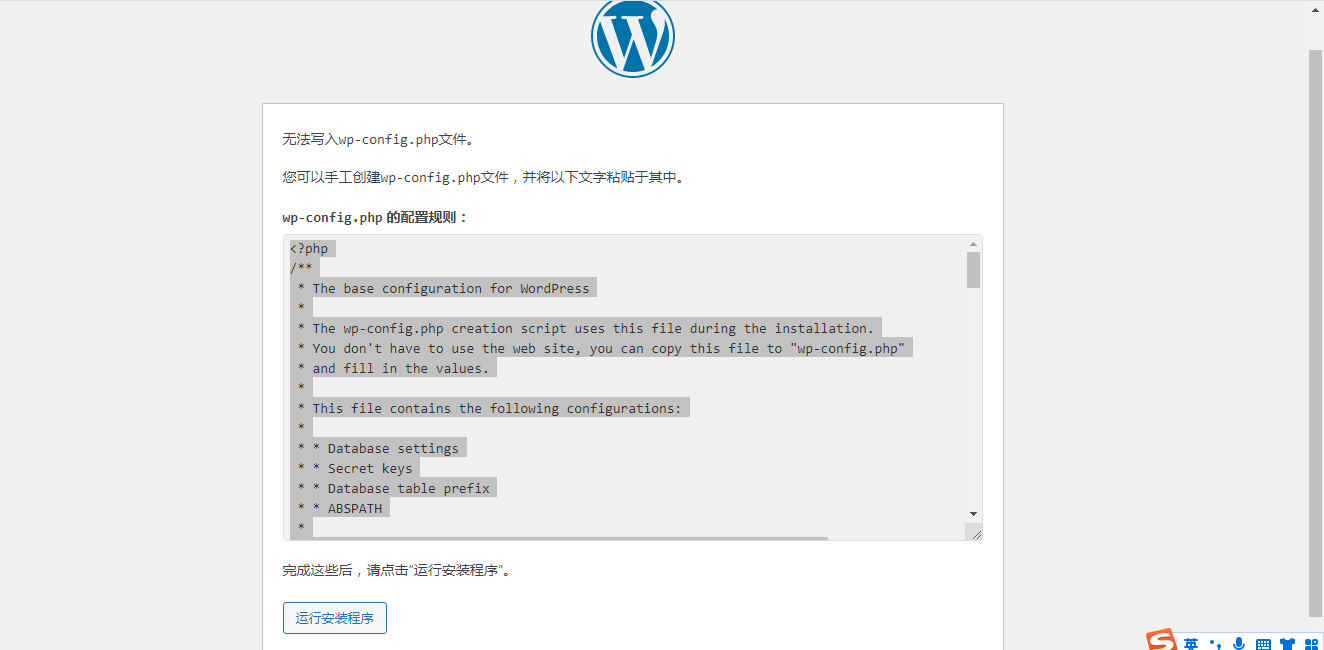
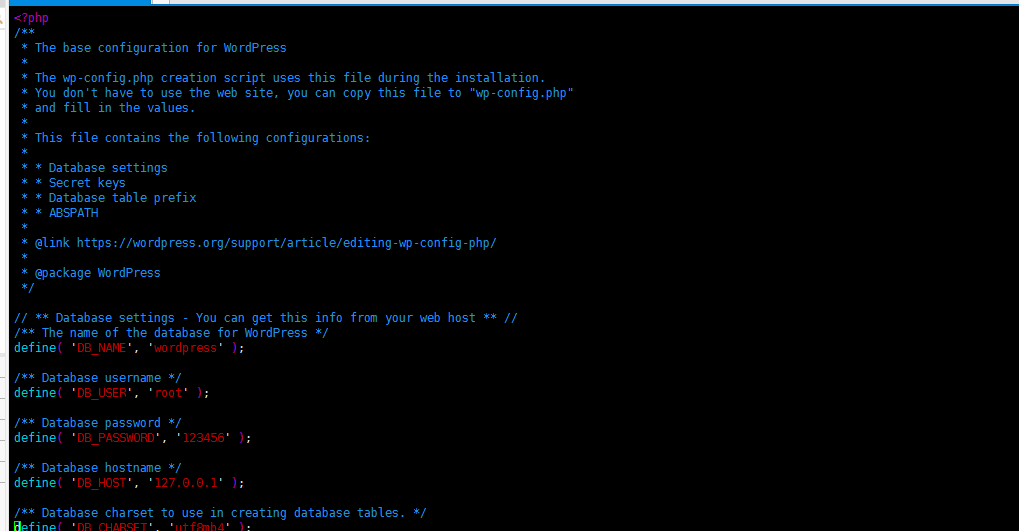
编辑,然后把配置规则里面的代码复制进来,保存并退出

然后点击浏览器刷新一下
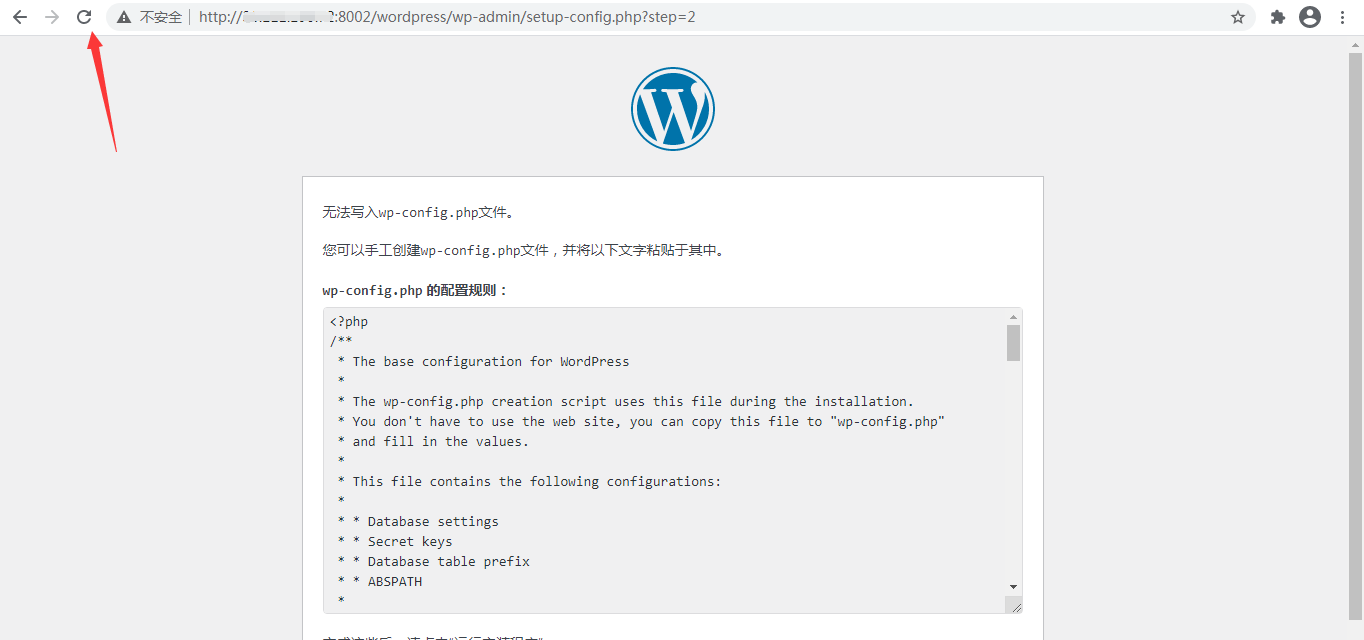
刷新后点击现在安装

给自己站点进行设置,搭建完成